Instructions:
Step 1: Click Templates Tab and New Template Button. Name your template, and then click Create.
-gif.gif?width=600&name=ezgif-com-gif-maker%20(30)-gif.gif)
Step 2: Upload a template document or form and select Mark Up Document. This document can be used to fill in fields and add signature blanks to documents automatically.
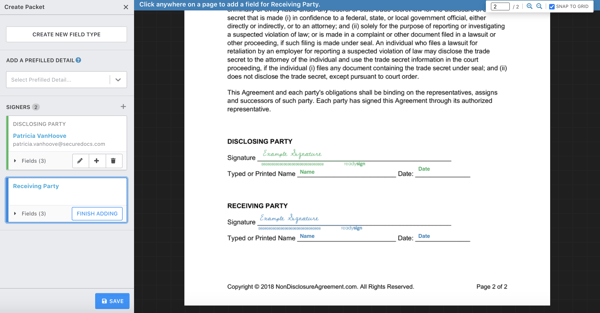
.png?width=350&name=Untitled%20design%20(53).png) Step 3: Add Fields to fill in when sending a document. Click Create New Field Type to create custom fields. These will be filled out by the sender prior to sending for signature.
Step 3: Add Fields to fill in when sending a document. Click Create New Field Type to create custom fields. These will be filled out by the sender prior to sending for signature.
-png.png?width=600&name=Untitled%20design%20(55)-png.png)
Step 4: Add Signers: Give the signer a nickname and if you know the name and email address you can add those here. If they always change you can leave it blank.
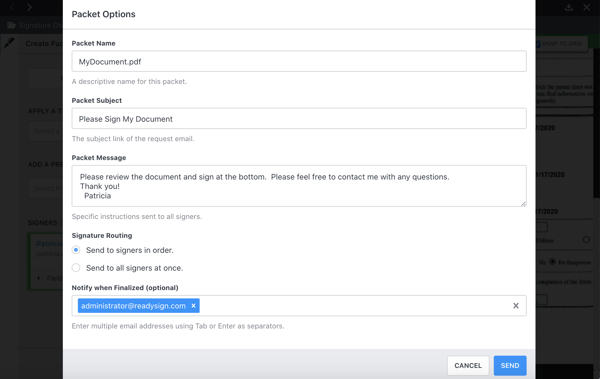
Step 5: Fill in Packet Options: These are defaults and can be changed with each template that you send for signature.
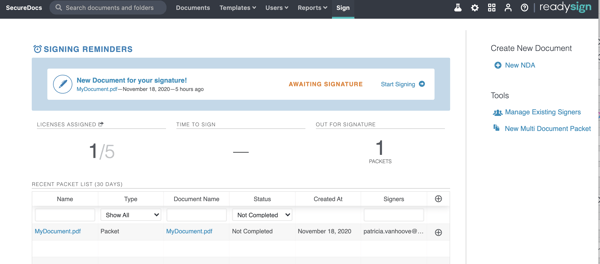
Step 6: Your Template is Ready! To send a Template, click the Sign tab and select your template from the ‘Create New Document’ list. Or click the Pen next to your document and apply the template during the signing process.