Instructional Video:
Instructional Guide:
Step 0:
Sign into ReadySign. Find or upload the document you want to send for signature. Click the pen icon to the left of the document name to begin.
.webp?width=536&height=305&name=Screen%20Shot%202022-10-14%20at%208%20(3).webp)
Step 1:
You can see the document you are working with here. You can click the three vertical dots to the right of the page and select Apply Template. Decide the appropriate template to apply to the document and select Submit.
.webp?width=522&height=298&name=Screen%20Shot%202022-10-14%20at%208%20(2).webp)
If you are happy with your choice of document and template, you can proceed to Step Two by selecting Next at the bottom of the page.
Step 2:
You’ll see the Add Signers page. You can also see the nicknames of the signers that usually sign this document. You will need to select each signer and fill in the appropriate Name and Email information.
.webp?width=537&height=306&name=Screen%20Shot%202022-10-14%20at%208%20(1).webp)
You can also remove and add signers at this stage.

This step is where you determine the signing order of your signers: in a specific order or all at once. "In Order" means the 2nd signer won't receive the document to sign until the 1st signer has signed, then the 3rd signer won't receive the document until the 2nd signer has signed, etc. "All At Once" is used when the order of signatures is not relevant. When everyone is added and you have selected your desired routing you can click Next.
Step 3:
This step has three components that you should be aware of.
1) There is the left side bar, which is where you select your signers and the fields that you want to assign to each signer.
2) There is the right side bar, which depending on the field selected will show you different options for that field. For example, for a checkbox, the right side bar will give you options for how many checkboxes to display and how many checkboxes are required. You'll also notice that on the right side bar you have the option to make any field optional or required.
3) The third component of Step Three is the middle document viewer. You can drag and drop fields onto the document exactly where you want them, and easily navigate between pages.
To begin: Click on the "Prefilled Details" at the top of the left side bar if your template has Prefilled Details that need to be filled in before sending for signature. You can tell if these need to be filled out by the presence of the blue "Fill Fields" box.

Fill out any needed values by clicking "Needs Value" next to the fields. When all of these are completed, click the Back arrow at the top left of the section.

The necessary signature and information blocks needed from your signers should already be on the document. However, if you need to add something you don't see you can click on that signer's name on the left and drag and drop anything you need.
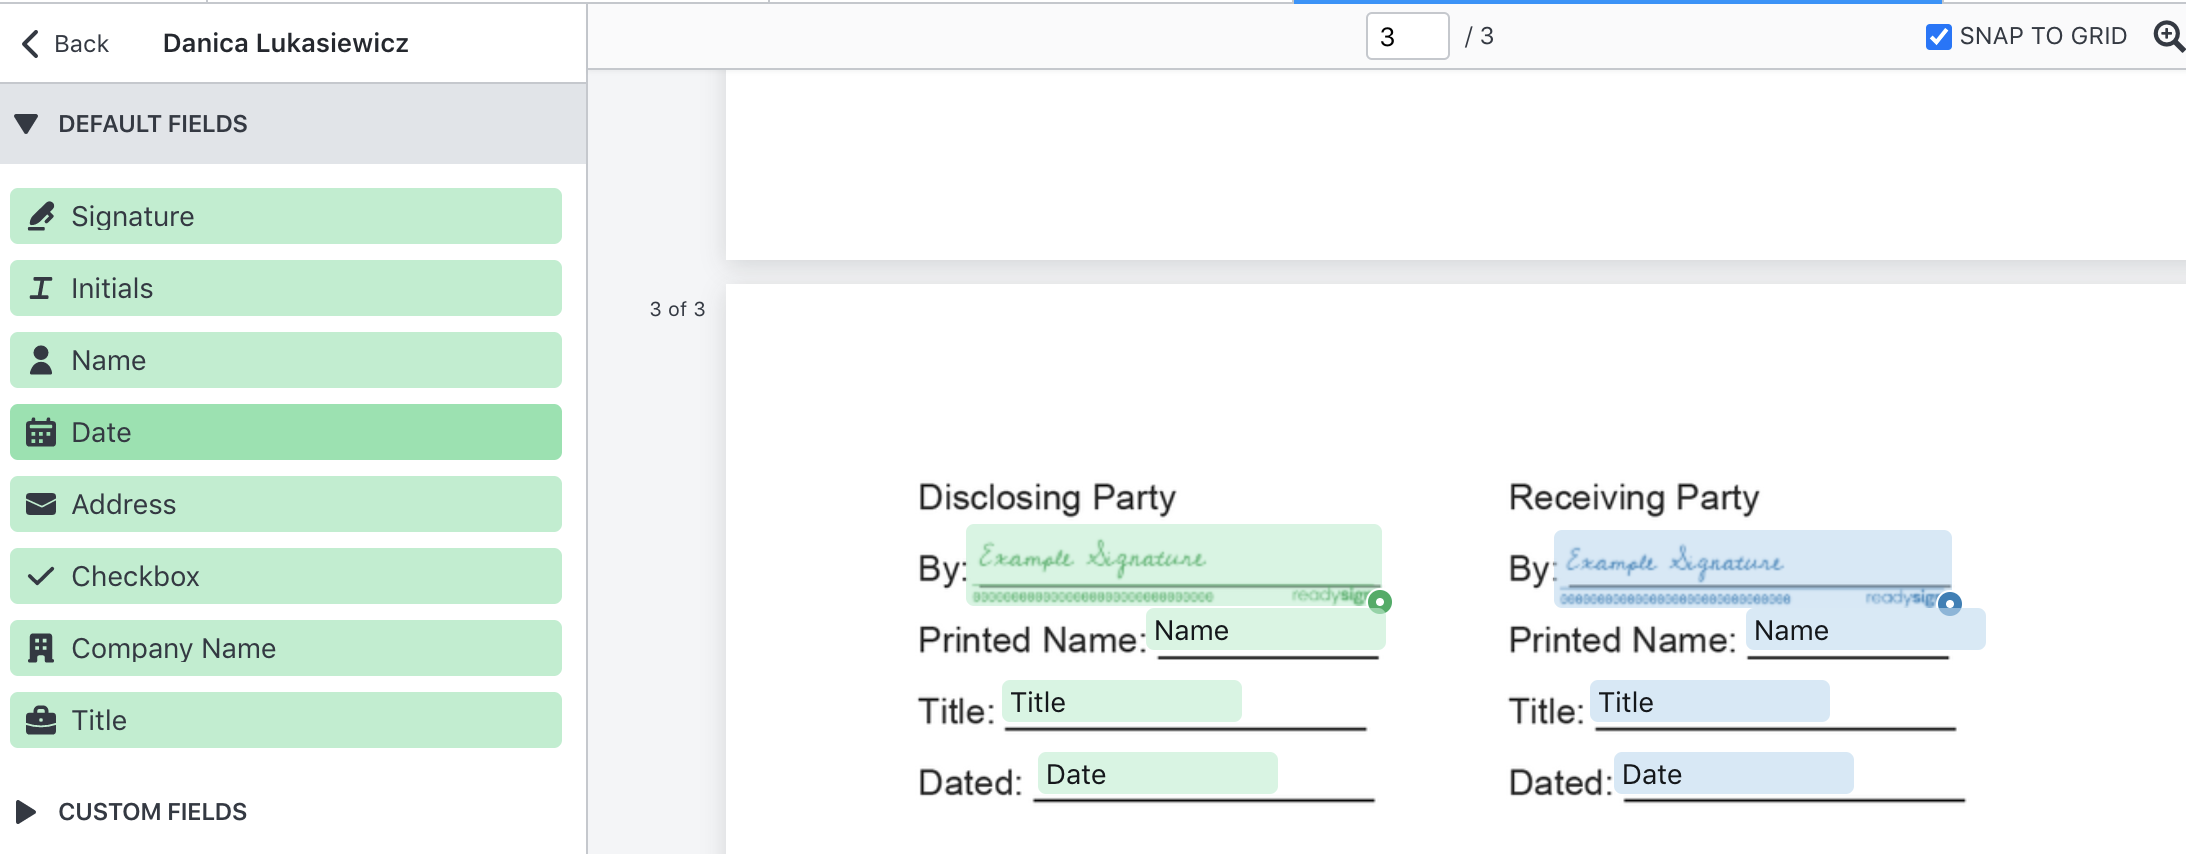
You can also change any applicable settings on the right side bar. Once you are happy with your document setup you can click Next.
Step 4:
The information in Step 4 is filled in from the template but you can change/manage any of the Message Details. Then, click Send and your packet will be sent to your signers immediately for signature, in the order you specified in Step Two. You'll then be taken to the audit trail for your packet.
