Instructional Video:
Instructional Guide:
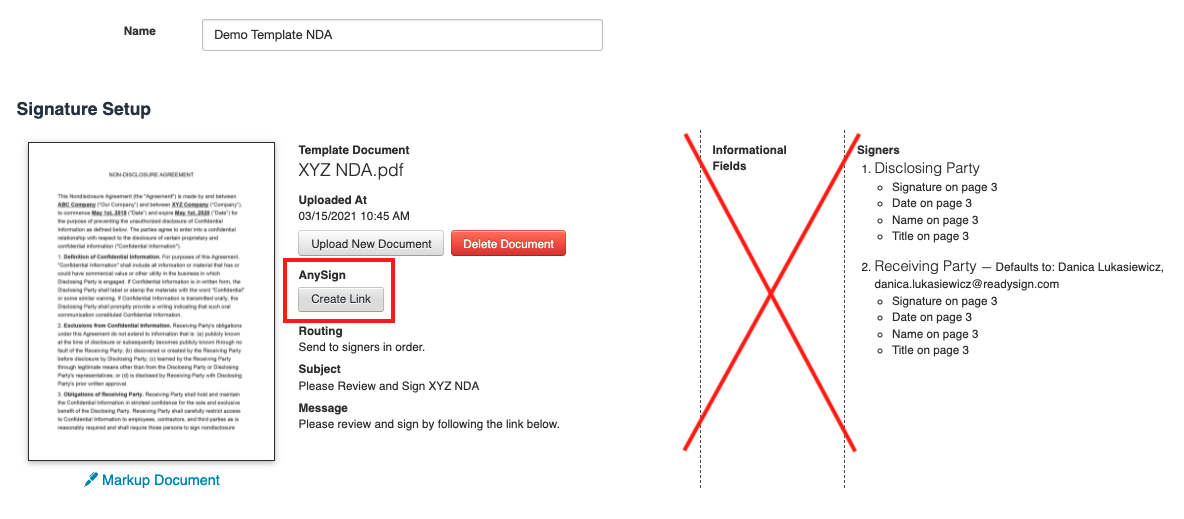
Step 1: Create or Find Your Template- Go to the Templates tab in ReadySign. The template you would like to create an AnySign link for must be created first. If you have not created your template do that now. Instructions for this can be found in the help article "Creating a Template".

Step 2: Select Your Template and Create Link- Click into the template you would like to set up. You should see an AnySign section to create the link. Click on the Create Link button to get started. Only documents with no pre-filled details (information that needs to be entered in prior to the document being sent) will be able to create a successful link.
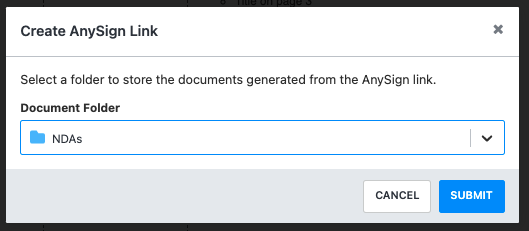
Step 3: Select a Folder- Select a folder for these documents to be uploaded into. Any documents created and signed using the AnySign link will be uploaded into this specific folder. The document will be named [name provided]_[template name], so for example if John Smith completed the document, the document name in the system will be John Smith_Demo Template NDA.
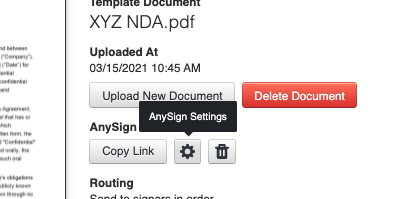
Step 4: Use the AnySign Link- Once completed, the AnySign link is now active and can be copied/ pasted into your desired location, such as an email or website. The routing option and email messaging will default to what has been set up at the template level. To change these, you can click ‘Markup Document’ to make any adjustments.

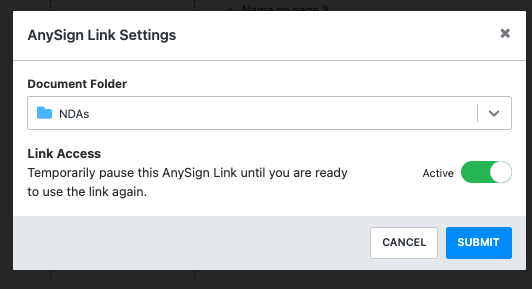
Step 5: Change Settings- In the gear icon, you can pause the link if you do not want anyone to sign the document for a period of time or change what folder the signed documents are going into.
Step 6: Receive Notifications once Completed- Anytime the document is signed, the creator of the link will receive an email notification letting them know someone has used the link.