Instructional Video:
Instructional Guide:
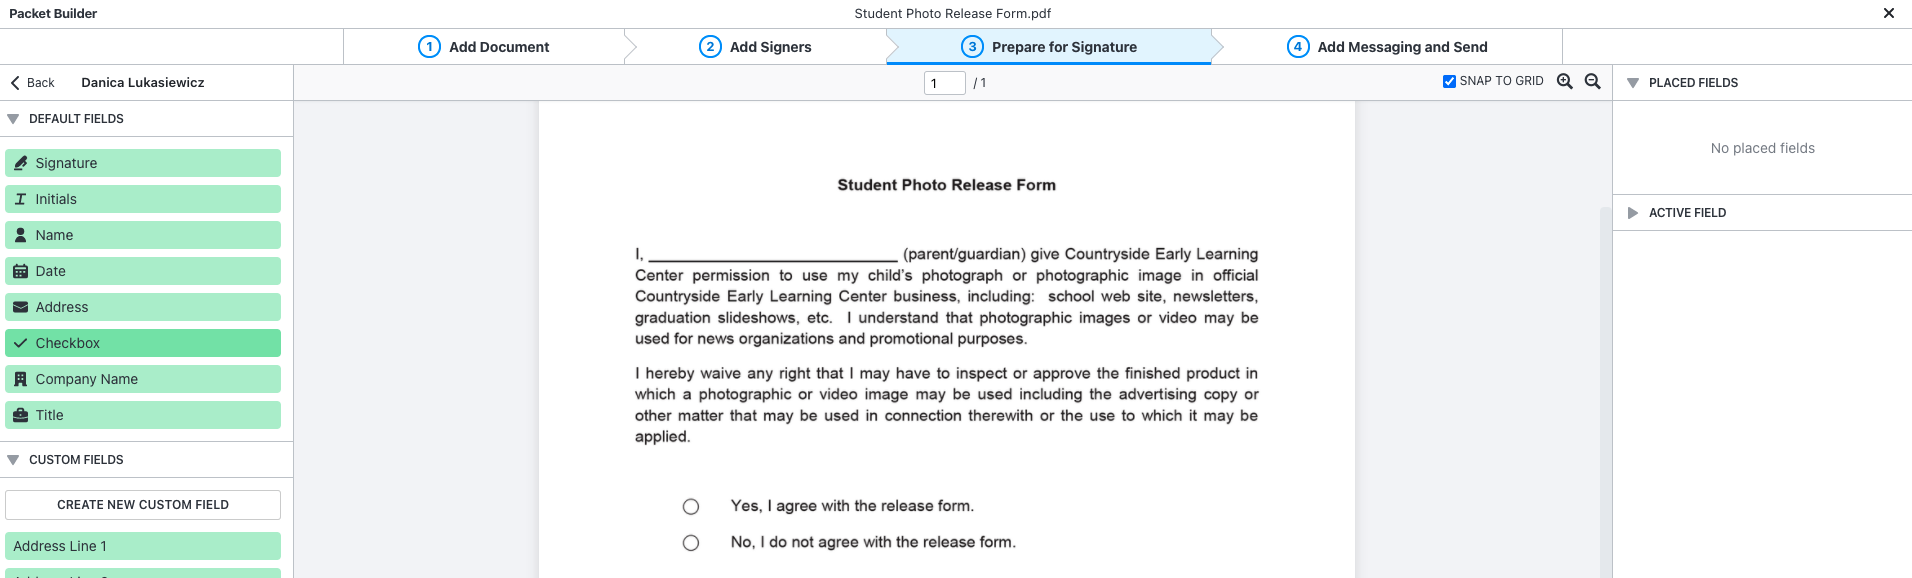
Step 1: Find the document, signer, and location of the desired checkboxes.
When you are on Step 3 of the packet builder, you will select the signer that you want the checkboxes to be assigned to.
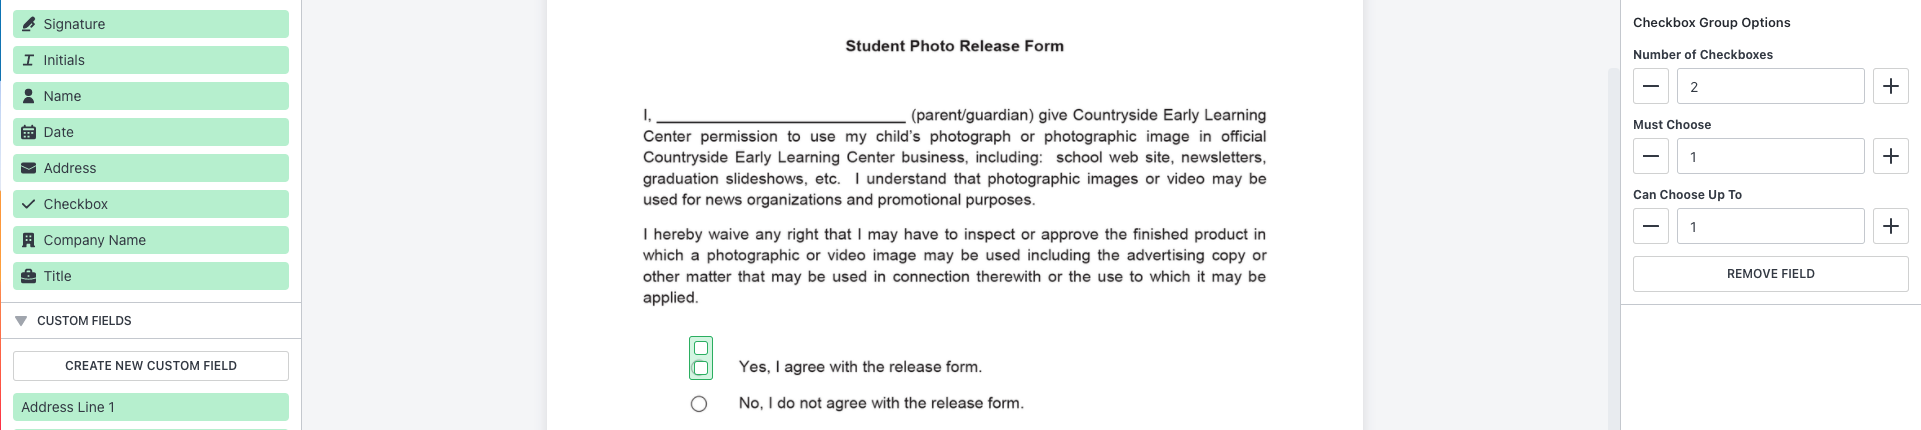
Step 2: Drag the checkboxes onto the document and edit the conditions.
Select the Checkbox default field on the left of the screen and drag and drop it onto the document. Then on the right edit the conditions appropriately. This is where you can edit how many checkboxes your signer can see, how many they have to select, and how many they can select.
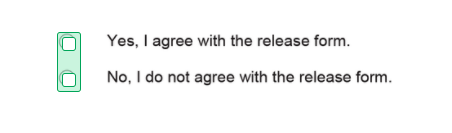
Step 3: Place your checkboxes on the document.
Once you have selected how many checkboxes the signer will see, you will want to align them with your document. Do this by simply dragging and dropping each individual box or by dragging and dropping the entire set of checkboxes. The checkboxes can be set horizontally, vertically, or not aligned at all.
Need additional assistance?
Contact us at support@readysign.com or 866.700.7975.